
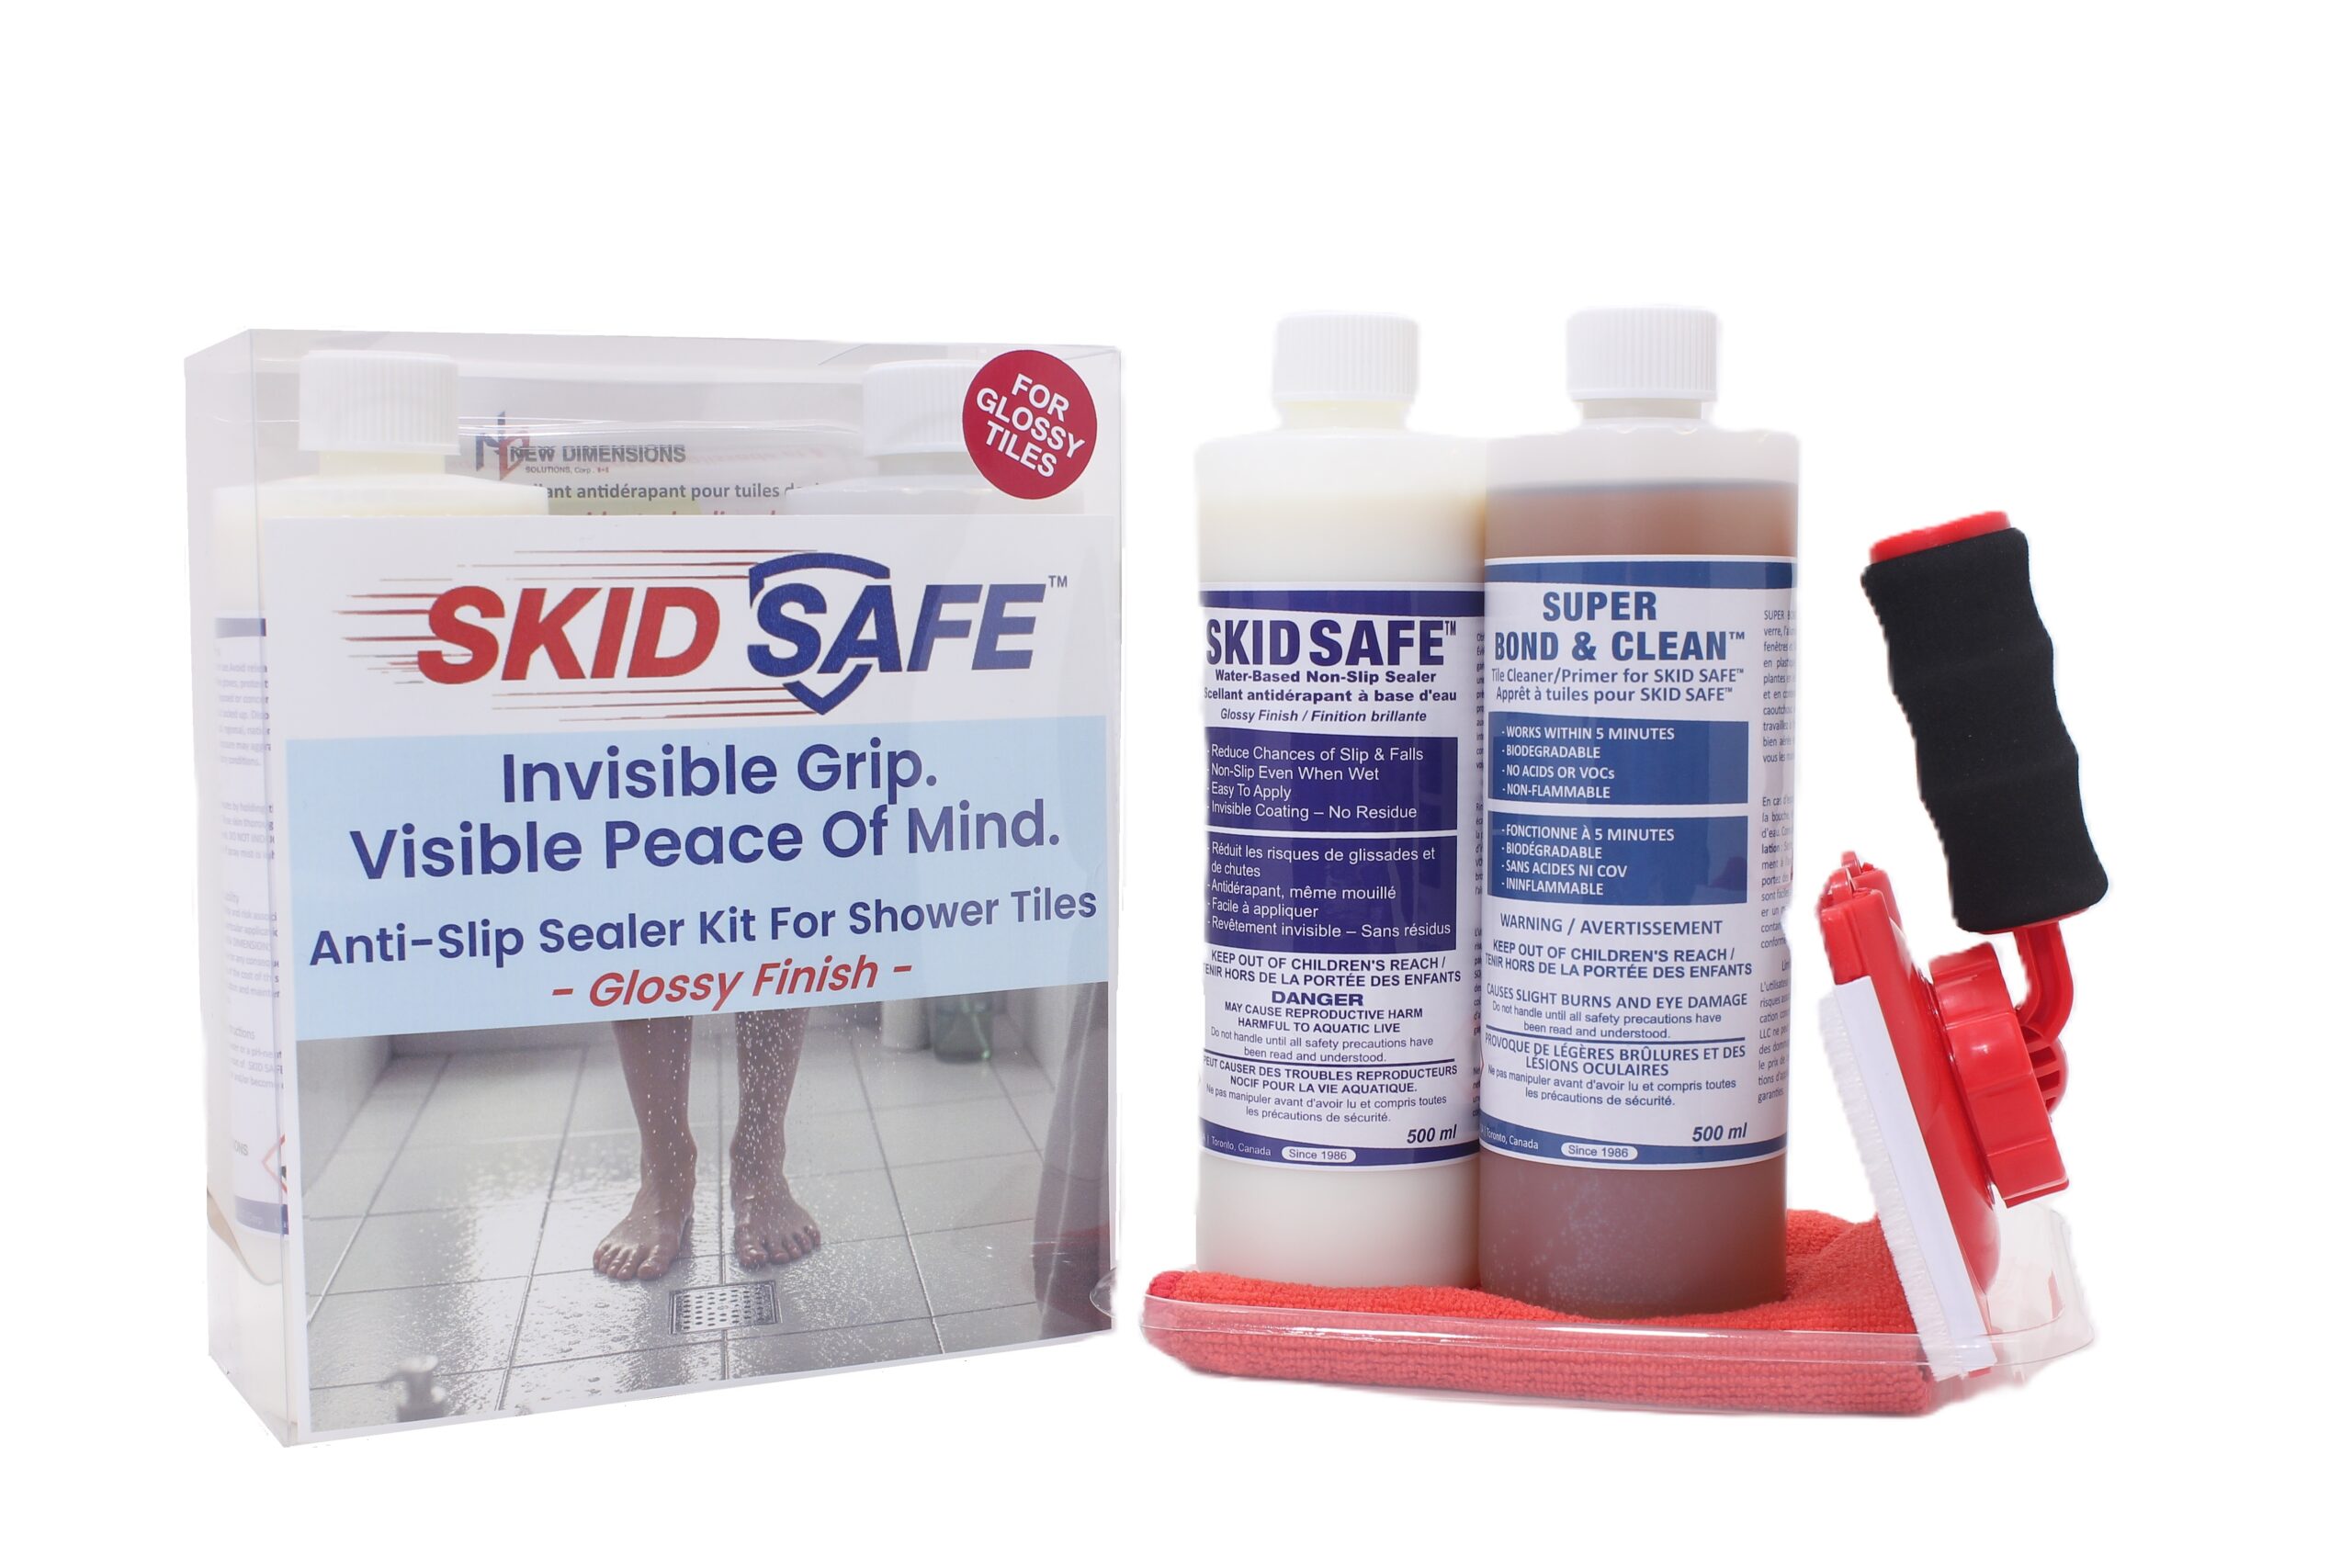
SKID SAFE™ Anti-Slip Sealer Kit for Shower Tiles
SKID SAFE™ Anti-Slip Sealer Kit for Showers Tiles (35 sq. ft.)
★★★★★ 4.85/5 based on 13 reviews
SKID SAFE™ Anti-Slip Sealer Kit for Shower Tiles (35 sq. ft.)
Main Benefits
– SKID SAFE™ Anti-slip Sealer Kit is specifically designed for shower tiles.
– Invisible, no-texture grip to reduce the risk of slips and falls for seniors, children, and all family members.
– Easy DIY application process with step-by-step instructions included.
– Non-slip performance, even when wet, has been verified by 3rd party lab testing.
– Includes 16 Fl. Oz of anti-slip sealer in glossy or satin finish, cleaner/primer, applicator, tray, cloth, covers 35 sq. of tiles.
– The sealer effectively seals and protects surfaces for up to 2 years.
– Manufactured in North America since 1986.
🏠 SKID SAFE Project Selector
Find the perfect non-slip protection solution for your surface
Q1: Floor Surface needing non-slip protection
TILE
Ceramic, porcelain, brick, marble, stone, or limestone
CONCRETE
Unsealed concrete surfaces
ALL OTHER SEALED OR PAINTED SURFACES
Tubs, wood, vinyl, laminate, metals, acrylic etc. (non-porous)
Q2: Area to be covered
Q3: Do you want to add ND AGGREGATE?
Traction grains e.g. for swimming pools, entrances, exterior walkways, etc.
YES
Add traction grains for extra grip
NO
Standard treatment without aggregate
🎯 Recommended Product
Graffiti Protection Selector
Find the right ND Graffiti Shield kit for your surface
Q1: Surface needing protection
Q2: Area to be covered
Q3: For easy paint/graffiti removal, do you want to add 1-quart DISAPPEAR ORGANIC GRAFFITI ADHESIVE PAINT REMOVER?
✔
Recommended Product
Surface Type:
Coverage Area:
Add Remover:
Product Recommendation:
Step 1. Wash, clean and thoroughly dry application area.
WARNING: IF APPLYING ON TILE, CONTINUE TO STEP 2. IF APPLYING ON ANY OTHER SEALED SURFACE, CONTINUE TO STEP 3.
Step 2. Wear gloves and eye protection. Work in sections that you can comfortably access and reach. Using the applicator cloth, liberally apply Super Bond & Clean™ over floor tiles, ensure entire tile surface is well soaked. Continue to spread/move SB&C™ on the tiles to keep it from drying out for 5 mins. Thoroughly wash the area multiple times to ensure all SB&C™ has been washed off. Make sure surface is completely dry before the next step.
Step 3. Pour a small amount of SKID SAFE™ into the tray, using the applicator THINLY and evenly apply a coat on the floor. Use slow consistent movement without creating bubbles to blend and smooth the SKID SAFE™ so that the surface appears uniformly wet with no puddles, dry areas or debris.
Step 4. Wait 15-20 mins, or until surface is completely dry. Repeat Step 3. and 4. for three more coats, making sure coats are thin and smooth.
Step 5. For foot-traffic, allow 8 hours to cure. Otherwise allow 24 hours, ideally 48 hours to cure before allowing surface to come in contact with water.
Covers up to 35 sq. ft. of tiles
13 reviews for SKID SAFE™ Anti-Slip Sealer Kit for Shower Tiles (35 sq. ft.)
Add a review Cancel reply
Yan Te. –
The shower tile had very little grip when wet. This made a noticeable difference.
Mark –
The tile looks the same, but it feels safer underfoot.
T. J. –
Used on shower floor tile and the grip improved even with water on the surface.
Ryan F. –
Did not expect the difference to be this noticeable!
Jessica M. –
The floor feels more secure during normal shower use.
Stephanie –
The tile appearance did not change, which was important to us.
Sarah K. –
Makes the shower feel safer without adding mats or strips.
Edam F. –
This product is great!
Sarah –
Application was quick and the result was easy to feel.
Nicole –
Worth using if your shower tile gets slippery when wet.
Sofia T. –
Not visible change to the surface.
SafeStep23 –
grip improvement
Priya R. –
This is good for the shower tile kit.